DIY Floating Bookshelf without Damaging any Book

One of the easiest ways to make a significant change in your room is creating bookshelves. When all neatly set up, books add an element of classic sophistication and with an invisible bookshelf, you can create an element of mystery as well. More importantly, you get to clear up the clutter that books create when left lying around.
An invisible bookshelf, also called a floating bookshelf, provides several other advantages. First, it takes up little space meaning you can easily fit it in any room and corner. It also allows you to easily order up your books whether by author subject or favorites. Its decorative element also means that it will sit perfectly with any theme or décor.
How much time does it take and what is the level of difficulty?
Well, fitting one invisible bookshelf will take about ten minutes and even shorter once you understand the process. The overall duration of the process is largely dependent on the number of shelves you need to cater for your books.
Ultimately this is decided by the number of books you have. I would not recommend stacking up more than 30 centimeters high since it loses the shelves’ appeal and the convenience of easily locating and getting a book you need.
The good thing about this project, it is easy to carry out with no prior experience or skills needed besides knowing simple measurement and how to use a drill.
Materials Needed
All materials needed are easy to obtain from your local hardware supplies store. You will need a tape measure, a stud finder and a set of L-brackets. The length of the L-brackets will be determined by the size of books and space where you plan to build the shelf. Usually, a medium sized set works well.
You will also need a solid hardcover book to serve as the bottom book and foundation for the shelf. You also require a set of screws, some Velcro and a drill that fits well in your hands. Once you have all the materials needed and you have identified your location, the following are the steps you need to follow to make the shelf.
Step 1. Location of the L-bracket on book
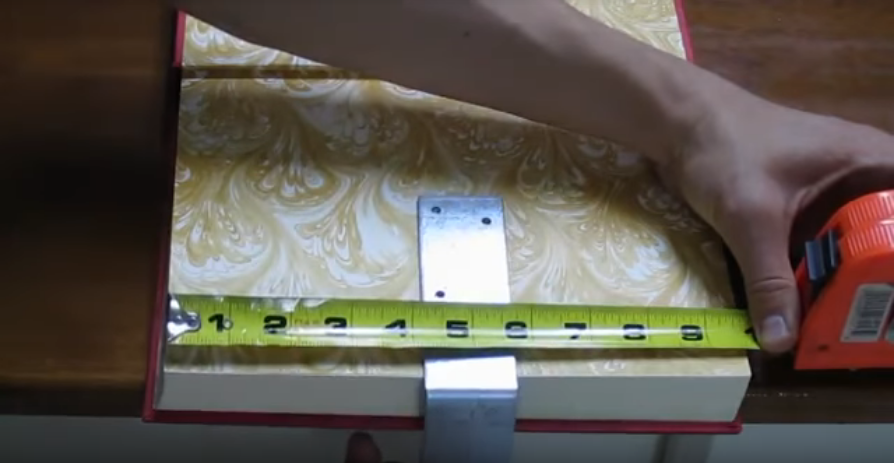
First, start by identifying where the L-bracket will fit in the book. Get to the last page of the book you have selected to serve as the bottom book. You want to have the L-bracket placed in the middle so as to offer most support to the rest of the books.
Use your tape measure to measure the length of the book and identify the central location. You do not have to be accurate to the point as long as the width of the bracket is spread evenly over the central location.
Step 2. Place Velcro on the book and the lower side of the bracket
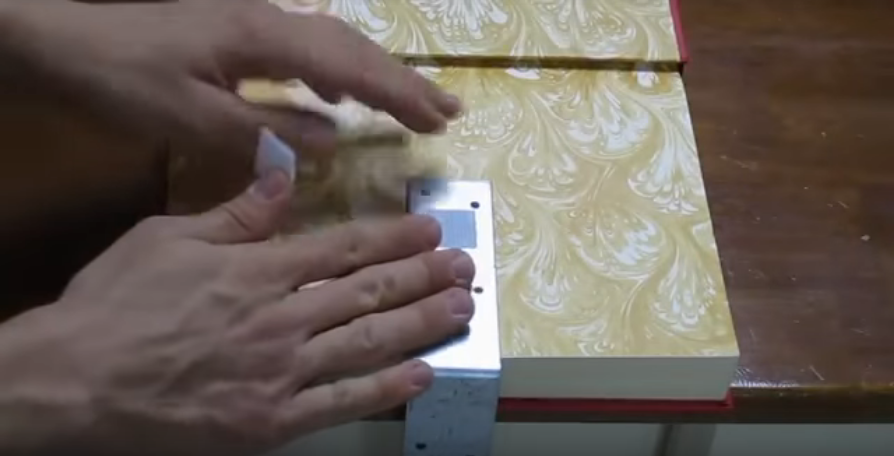
Once you have identified the location of the L-bracket on the book, the next step is to attach some Velcro on both the last page of the book and the bottom side of the bracket that will be in contact with the bottom cover of the book. This is important to ensure the cover hides the lower side of the bracket and holds still.
The easiest way to do this is first attach the Velcro to the bracket and then to be sure you get the right location for the Velcro for the book cover, just attach it on top of the one on the bracket with the sticky side up. Close the book and when you open it up the two separate and you have one on the book cover and another on the L-bracket.
Step 3. Identify the location for L-bracket on the wall
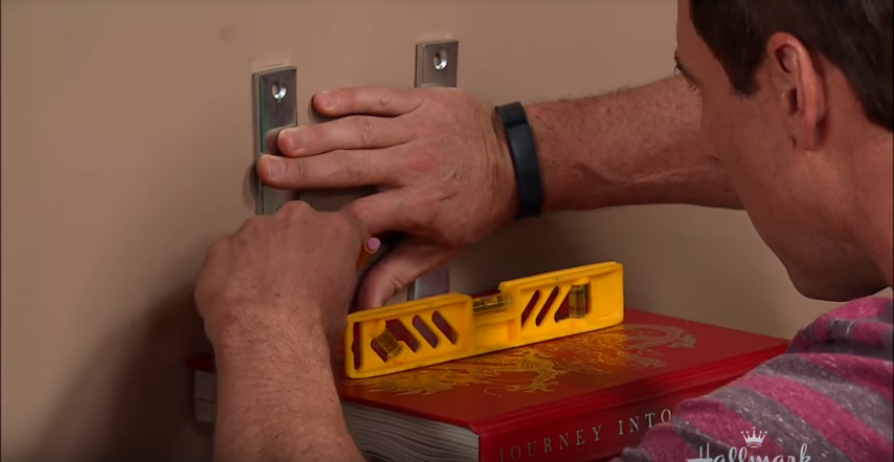
Depending on your wall, you will need to use a stud finder to locate where on the wall you will fix the L bracket. Then get the bracket on the wall at a level position and sketch out the holes on the wall where the screws will go in through. You should use a level finder to ensure the sketching process does not leave your brackets slanted.
Step 4. Punch holes in the wall with a nail
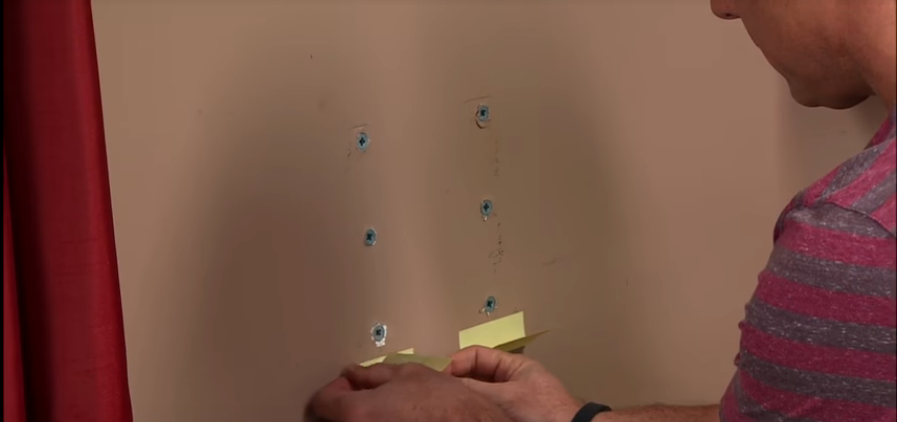
Once this is done, punch holes in the sketched spaces where the screws will go through. As an alternative especially if you do not locate studs, you can use wall anchors in place of nails and drill them to form a surface where the screws will be attached to.
Step 5. Screw bracket in
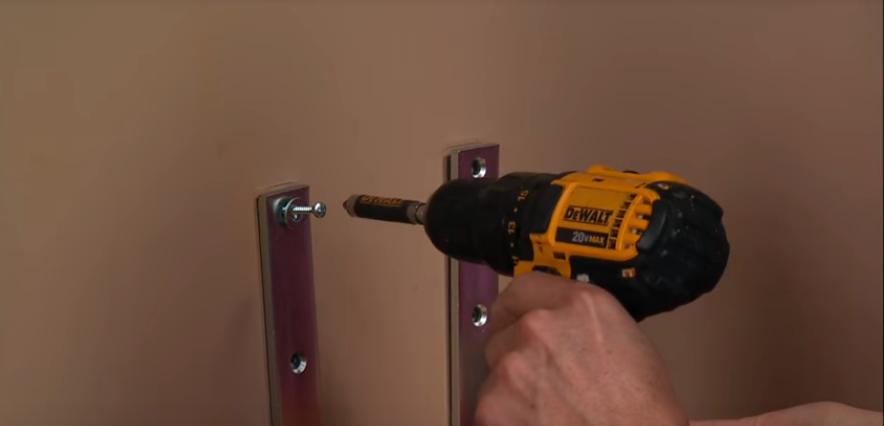
Once this is done, it is time to fasten the bracket to the wall. Make sure the side with the Velcro is facing down to attach to the lower cover of the book. Drill the screws in the wall all the while ensuring you maintain the right level.
Step 6. Attaching the base book to the bracket
With the L-bracket in place on the wall, the next step is to set up the foundation of the whole shelf by attaching the bottom book. Set it in place to ensure the Velcro strips are aligned together.
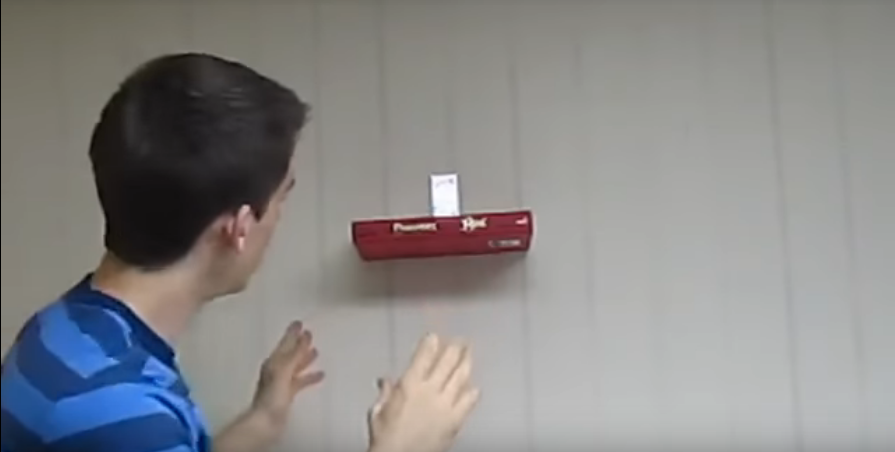
Step 7. Stack up other books
The final step is to add up other books to completely hide up the bracket from view and finish up the invisible bookshelf. Arrange the books in order of length based on the bottom book for a neat and stable finish.
Conclusion
In case you have wide books, or where you are looking for more stability, you can use two brackets per shelf. In most other tutorials, you will be asked to use an unwanted book and screw it to the bottom of the lower bracket.
This ends up damaging the book and can only apply in instances where you will never use the book again. This is the reason why I recommend the use of Velcro. This is one of the easiest and cleanest DIY projects you will ever do so do not hesitate to try it out and spruce up your room.
Here is a video guide to the whole process.
Author Bio:
Over the many years, we’ve been in operation, Flooring Removal Services has built a solid reputation providing demolition and flooring removal services.
-
-
-
-
/ 0 Comments