How to Ensure Long-Lasting Bathroom Waterproofing: Complete Guide
Have you ever noticed mysterious damp patches appearing on your bathroom walls? Perhaps you’ve spotted mould creeping into corners or detected that unmistakable musty smell that just won’t budge? These are telltale signs that something’s gone wrong beneath the surface. Bathroom waterproofing might not be the most glamorous topic, but getting it right can save you thousands of dollars and countless headaches down the track.
Think of waterproofing as your bathroom’s invisible shield. It’s working hard every single day, protecting your home’s structural integrity from the constant onslaught of water, steam, and moisture. When this protective barrier fails, the consequences can range from cosmetic damage to serious structural issues that affect your entire home. In Australia, where we love our long showers and relaxing baths, proper waterproofing isn’t just important—it’s absolutely essential.
In this guide, you’ll discover everything you need to know about bathroom waterproofing glen iris. We’ll explore the basics, help you identify warning signs of failure, and walk you through choosing the right materials. Plus, we’ll cover professional application techniques, maintenance tips, and common mistakes to avoid. Whether you’re renovating an existing bathroom or building new, this information will help protect your investment for years to come.
Understanding Bathroom Waterproofing Basics
What Is Bathroom Waterproofing and How Does It Work?
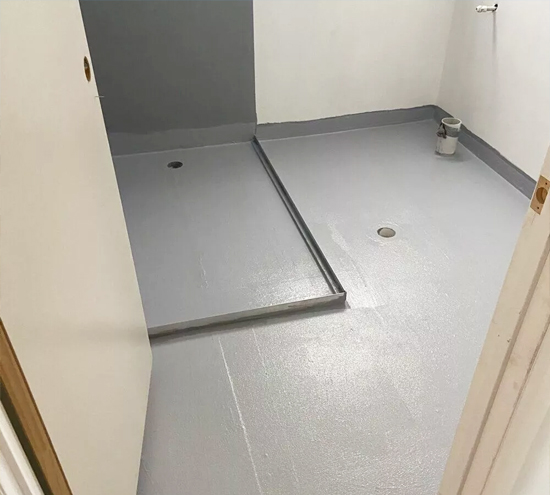
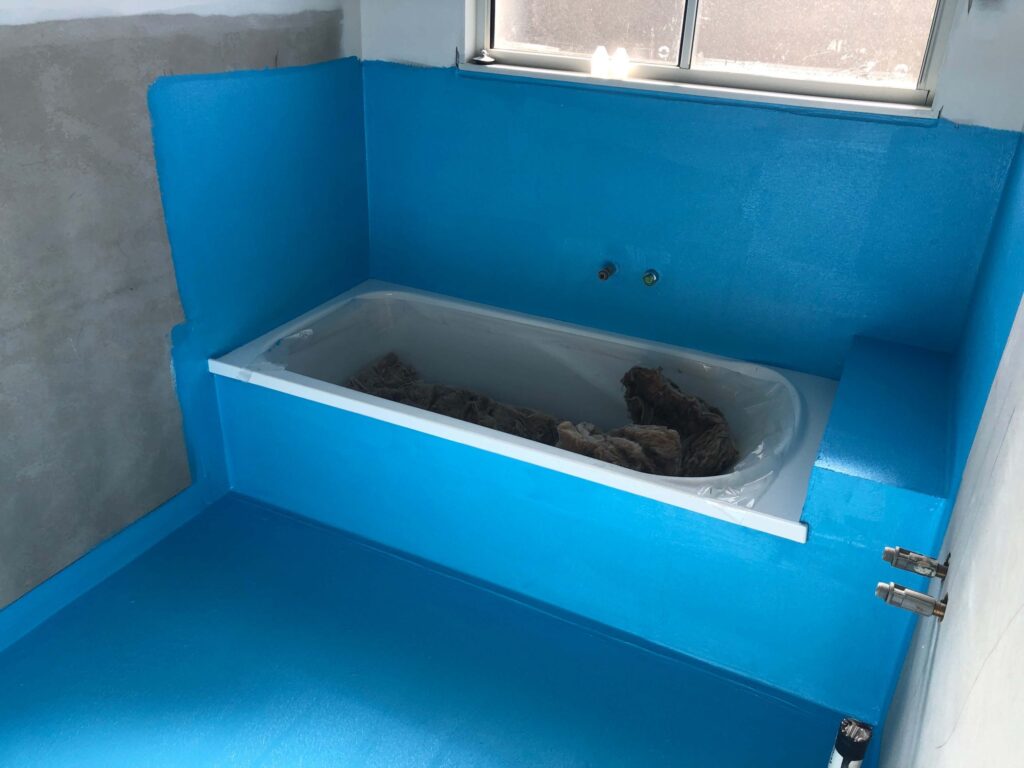
Bathroom waterproofing involves applying a protective membrane to surfaces that are regularly exposed to water. This membrane creates an impermeable barrier that prevents moisture from seeping into your walls, floors, and the structural elements beneath them. Without this protection, water can cause timber to rot, encourage mould growth, and compromise your home’s foundations.
The waterproofing system works by completely sealing wet areas before tiles or other finishes are installed. It’s applied to prepared surfaces and must cure properly before any additional work continues. The membrane bonds to the substrate, creating a continuous barrier that channels water towards drains rather than allowing it to penetrate underlying materials.
Australian Standards for Bathroom Waterproofing (AS 3740)
In Australia, bathroom waterproofing must comply with AS 3740, which sets out minimum requirements for wet area construction. This standard specifies which areas must be waterproofed, the materials that can be used, and the qualifications required for installers. Following these guidelines isn’t optional—it’s a legal requirement that protects homeowners and maintains building standards.
Under these regulations, licensed waterproofers must provide certificates of compliance upon completing work. This documentation is vital if you ever sell your property or need to make an insurance claim. Non-compliant waterproofing can void warranties and create significant legal complications.
Key Areas That Require Waterproofing
Your bathroom has several zones that demand waterproofing attention. The shower recess requires full waterproofing on floors and walls to a minimum height of 1800mm. Floors in the entire wet area need protection, along with wall areas directly above baths and around fixtures.
Don’t forget about floor and wall junctions—these corners are particularly vulnerable to water ingress. Any penetrations for pipes or fixtures also need careful sealing to maintain the membrane’s integrity.
Signs Your Bathroom Waterproofing Has Failed
How Do I Know If My Bathroom Waterproofing Is Damaged?
Spotting waterproofing failure early can save you from major repairs. Look out for cracked or loose tiles, particularly in shower areas. Discoloured grout, peeling paint on adjacent walls, and visible mould are all red flags. You might also notice a persistent damp smell or see water stains appearing on ceilings below bathrooms.
Another warning sign is tiles that sound hollow when tapped. This indicates water has gotten beneath them, separating the adhesive from the substrate. If you notice any of these issues, it’s worth investigating further before problems escalate.
Common Causes of Waterproofing Failure
Poor installation sits at the top of the list. When membranes aren’t applied correctly or given adequate curing time, they simply won’t perform as intended. Using incompatible products or skipping surface preparation can also lead to premature failure.
Building movement and age contribute to degradation over time. Membranes can crack or lose adhesion as houses settle. Plus, physical damage from renovations or repairs that penetrate the waterproofing layer can compromise the entire system.
The Hidden Dangers of Ignoring Water Damage
Ignoring waterproofing problems is like ignoring a small leak in a boat—eventually, you’ll sink. Water damage spreads silently through your home’s structure, rotting timber frames and encouraging dangerous mould growth. The health implications of mould exposure include respiratory issues, allergies, and more serious conditions.
Repair costs multiply exponentially the longer issues go unaddressed. What might start as a simple membrane repair can become a full bathroom strip-out and rebuild. Early intervention is always more cost-effective.
Choosing the Right Waterproofing Materials
Types of Waterproofing Membranes Explained
Two main categories dominate the Australian market: liquid-applied membranes and sheet membranes. Liquid membranes come as one-part or two-part systems and are painted or rolled onto surfaces. They’re versatile and excellent for complex shapes and corners.
Sheet membranes are pre-formed materials that are adhered to surfaces. They offer consistent thickness and are particularly effective for large, flat areas. Both types have their place in professional waterproofing applications.
What Is the Best Waterproofing for Bathrooms?
The best waterproofing depends on your specific situation. Polyurethane liquid membranes are popular for their flexibility and strong adhesion. They handle building movement well and bond effectively to various substrates including concrete, cement render, and fibre cement sheeting.
For shower recesses, many professionals prefer a combination approach—using sheet membranes for floors and liquid membranes for walls. This provides reliable protection where it’s needed most while accommodating different surface requirements.
Liquid vs Sheet Membranes: Which Should You Choose?
Liquid membranes offer easier application around corners, penetrations, and irregular shapes. They’re generally more forgiving for DIY applications and create seamless coverage. However, achieving consistent thickness requires skill and experience.
Sheet membranes provide guaranteed thickness and can be faster to install on straightforward surfaces. They’re particularly effective for floor applications. The downside is that joints must be carefully sealed, creating potential weak points if not done correctly.
Step-by-Step Guide to Professional Bathroom Waterproofing
Surface Preparation: The Foundation of Success
Proper preparation makes or breaks any waterproofing job. Surfaces must be clean, dry, and free from dust, oils, or loose material. Any cracks or defects need repairing with appropriate fillers. Corners require reinforcing with bond breaker tape to accommodate movement.
The substrate should be primed according to the membrane manufacturer’s specifications. Skipping this step is a false economy—primers improve adhesion and help the membrane perform as designed. Allow adequate drying time before proceeding.
Application Techniques for Maximum Protection
Professional waterproofers apply membranes in multiple coats, typically with fibreglass reinforcement in high-stress areas. Each coat must dry completely before the next is applied. Attention to detail at corners, junctions, and penetrations separates quality work from substandard installations.
Membrane should extend beyond minimum requirements where possible. Overlapping at joints must meet manufacturer specifications. Throughout the process, maintaining consistent coverage without pinholes or thin spots is essential.
How Long Does Bathroom Waterproofing Take to Cure?
Curing times vary depending on the product used and environmental conditions. Most liquid membranes require 24-72 hours before tiling can commence. Temperature and humidity significantly affect curing—cold or damp conditions extend the process.
Rushing this stage is a common mistake. Applying tiles over uncured membrane traps moisture and prevents proper bonding. Patience here pays dividends in long-term performance.
DIY Bathroom Waterproofing vs Hiring a Professional
Can I Waterproof My Bathroom Myself?
Technically, yes—but there are important caveats. In most Australian states, DIY waterproofing is permitted for your own home, but you cannot legally certify the work yourself. This means you’ll miss out on the compliance documentation that’s valuable for insurance and resale purposes.
DIY waterproofing also requires proper knowledge, tools, and attention to detail. Mistakes are costly and often invisible until significant damage has occurred. For minor touch-ups or non-critical areas, DIY might be appropriate. For full bathroom waterproofing Melbourne , professional installation is strongly recommended.
When to Call a Licensed Waterproofer
Always engage a licensed professional for new construction, major renovations, or when replacing failed waterproofing. They bring expertise, quality materials, and—critically—the ability to provide compliance certificates. Their work typically comes with warranties that protect your investment.
Licensed waterproofers understand Australian Standards and local building codes. They can identify potential issues before they become problems and recommend appropriate solutions for your specific situation.
Maintaining Your Bathroom Waterproofing for Longevity
How Long Does Bathroom Waterproofing Last?
Quality waterproofing installed correctly should last 10-15 years or more. Some premium products claim lifespans of 25 years plus. However, longevity depends heavily on installation quality, product choice, and ongoing maintenance.
Regular inspection and prompt attention to minor issues help maximise lifespan. Building movement, wear and tear, and accidental damage can all shorten the effective life of your waterproofing system.
Preventative Maintenance Tips
Keep your bathroom well-ventilated to reduce moisture buildup. Check grout and silicone seals regularly, repairing any cracks or gaps promptly. Avoid using harsh chemicals that might degrade sealants over time.
Address any signs of water damage immediately. Small problems are infinitely easier to fix than large ones. Annual visual inspections help catch issues early.
Common Bathroom Waterproofing Mistakes to Avoid
The biggest mistake is rushing the job. Inadequate surface preparation, insufficient curing time, and skimping on materials all lead to premature failure. Using incompatible products from different manufacturers can also cause problems.
Another common error is waterproofing only the minimum required areas. Extending protection slightly beyond code requirements provides valuable insurance against splashing and unexpected water exposure. Finally, failing to properly seal penetrations and junctions leaves vulnerable weak points in your waterproofing system.
Protecting Your Investment for Years to Come
Bathroom waterproofing might work invisibly, but its importance cannot be overstated. From understanding the basics and recognising warning signs to choosing appropriate materials and maintaining your system, every step matters. Quality waterproofing protects your home’s structure, safeguards your family’s health, and preserves your property’s value.
Whether you’re building new or renovating, investing in proper waterproofing is one of the smartest decisions you can make. While DIY options exist, the expertise and certification that licensed professionals provide offer peace of mind that’s genuinely worthwhile. The cost of quality waterproofing pales in comparison to the expense and stress of repairing water damage.
Take the time to get your bathroom waterproofing right from the start. Your future self—and your wallet—will thank you. If you’re unsure about your current waterproofing’s condition, don’t hesitate to seek professional advice. It’s always better to be proactive than to deal with the consequences of failure down the track.
-
-
-
-
/ 0 Comments